
Sharpening Japanese knives is not just a maintenance task—it’s a craft in itself. When you learn how to use the right whetstone for Japanese knives, hold the proper Japanese knife sharpening angle, and follow a consistent technique, you unlock the true performance of your blades and extend their life for years.
This guide is designed for curious home cooks, passionate culinary enthusiasts, and working chefs who want professional, repeatable results. We’ll walk through whetstone selection, sharpening angles, step-by-step techniques, and advanced tips—plus how to test sharpness and maintain your edge between full sharpening sessions.
Why Proper Sharpening Matters for Japanese Knives
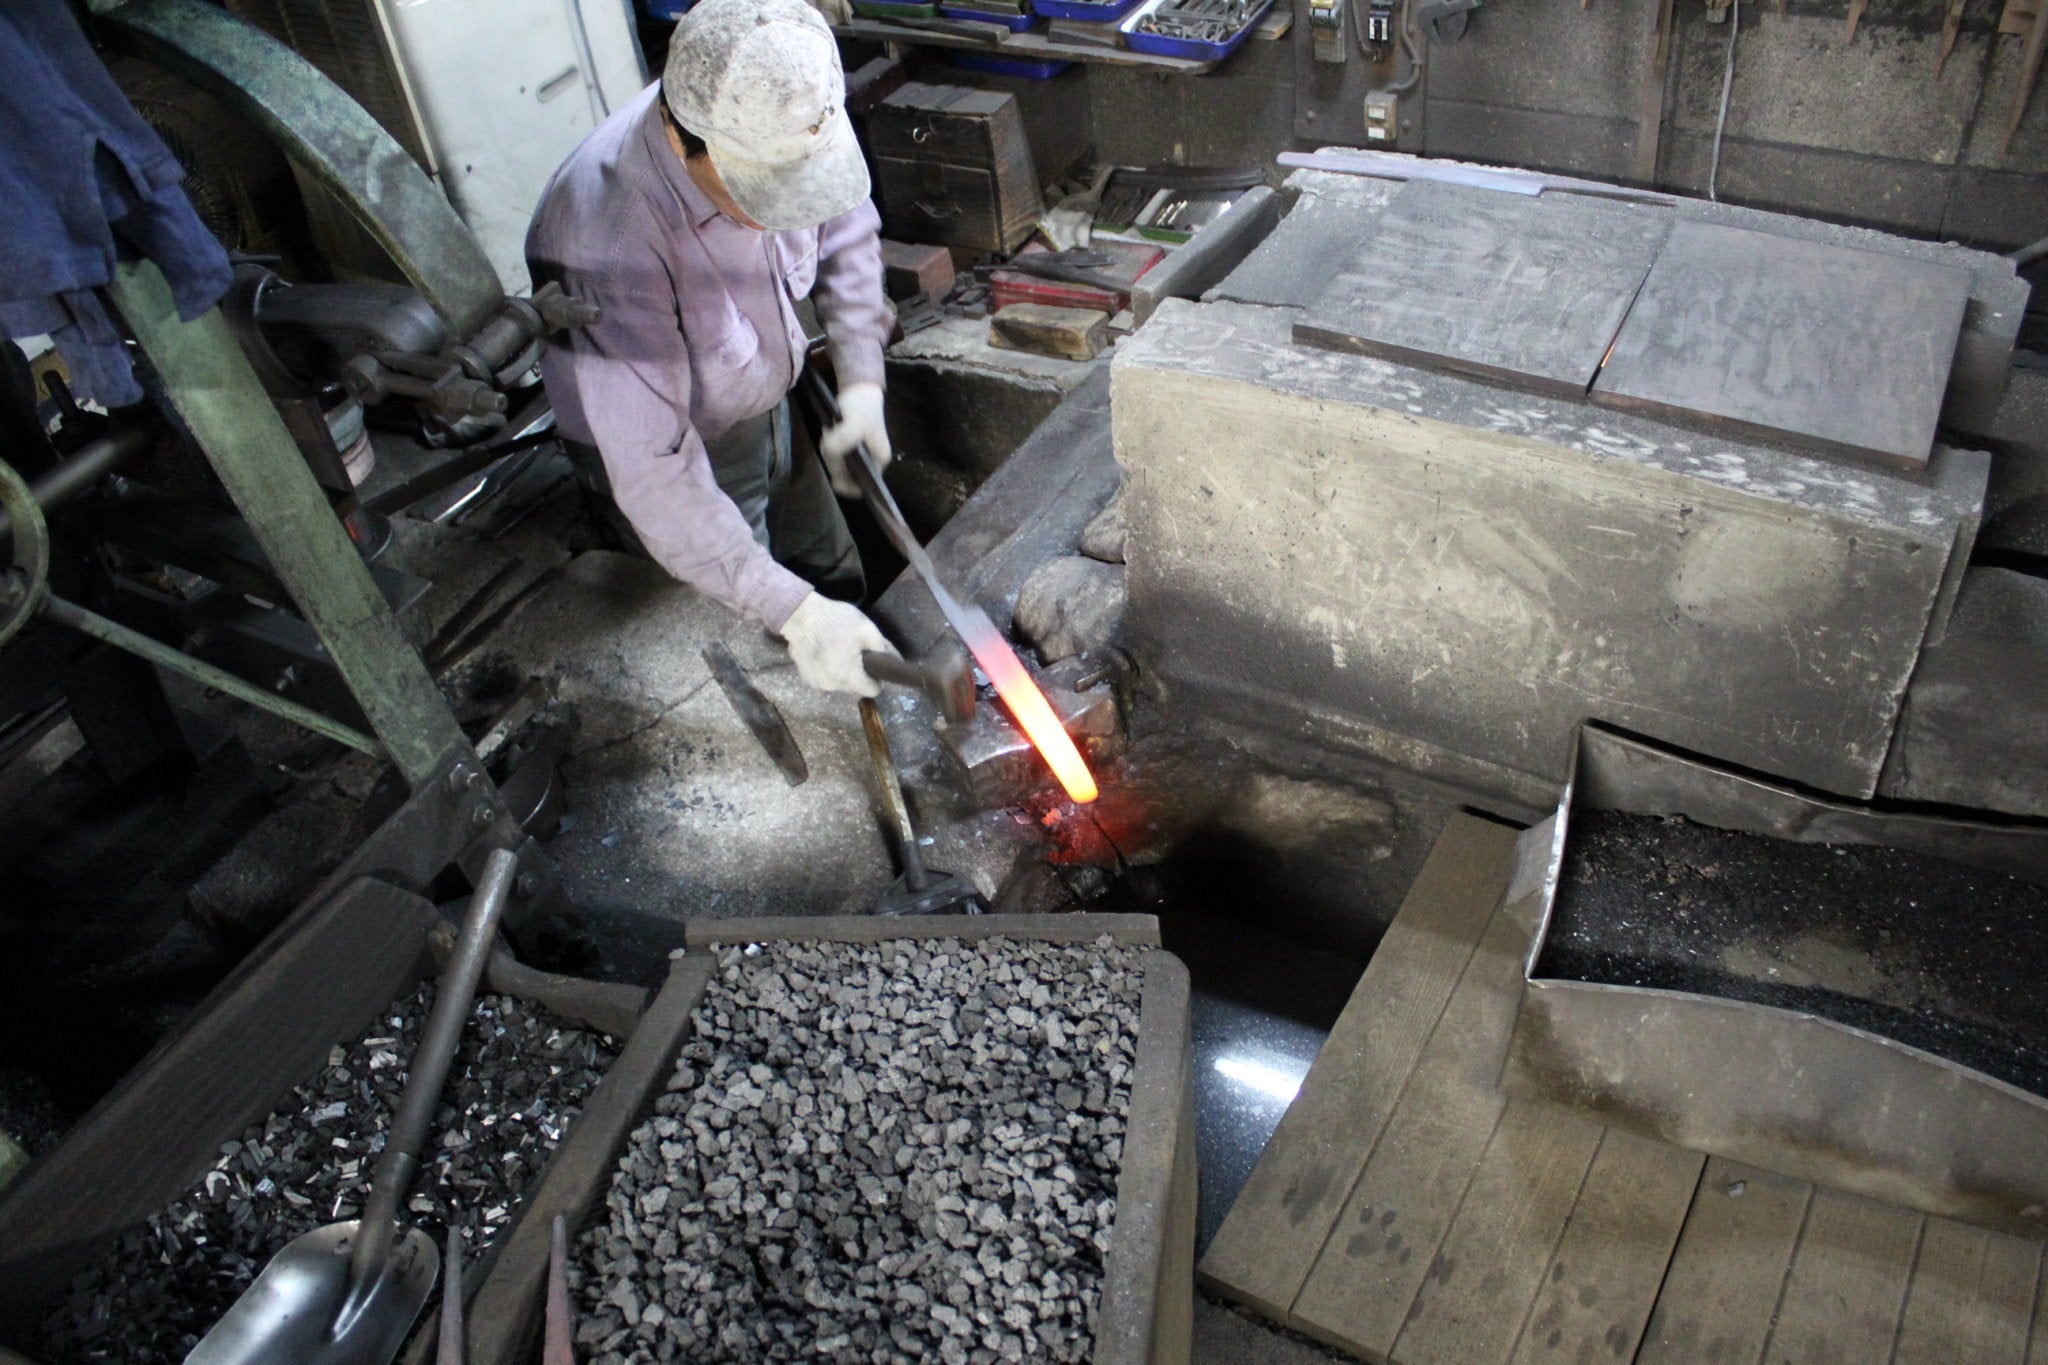
Japanese knives are renowned for their thin profiles, hard steels, and laser-like performance. That performance depends on one critical factor: the quality of the edge. Even the finest Sakai, Seki, or Sanjo blade will feel dull and frustrating if it isn’t sharpened correctly.
Compared to many Western knives, Japanese blades often use harder steels (such as White steel, Blue steel, Ginsan, VG10, SG2, and others). Harder steel holds an edge longer but also demands more precision when sharpening. The wrong technique—or the wrong tools—can:
- Chip or roll the edge
- Create uneven bevels that steer in the cut
- Remove too much steel and shorten the life of the knife
- Leave an edge that feels sharp initially but dulls quickly
When you learn how to sharpen correctly, your knife will:
- Slice cleanly through tomatoes, herbs, and proteins with minimal resistance
- Make prep work faster and more enjoyable
- Be safer—sharp knives are more predictable and require less force
- Reflect the care and respect you have for the craft of cooking
Honing vs Sharpening: What Home Cooks Often Get Wrong
Do you need to hone your knife, or sharpen it? The terms are often used interchangeably, but they are very different processes.
What Honing Does
Honing is the act of realigning the edge, not removing significant material. On softer Western knives, this is often done with a steel rod (“honing rod”). As you use the knife, the edge can bend microscopically. Honing nudges it back into place.
What Sharpening Does
Sharpening removes steel to recreate a clean, fresh bevel. This is accomplished with abrasive tools like whetstones for Japanese knives. A true sharpening session shapes the geometry of the edge, forms a burr, refines it, and polishes it for smooth cutting.
Why Japanese Knives and Western Honing Rods Don’t Mix Well
Traditional hardened Japanese steels can be brittle compared to softer Western steels. Aggressive honed-steel rods, especially those with ridges, can chip a thin, hard Japanese edge.
Instead of relying on a Western honing rod, Japanese knife users typically:
- Use a fine finishing stone or ceramic rod very gently for touch-ups
- Strop on leather to realign and polish the edge
- Perform regular, light sharpening sessions on a water stone
In short: honing is maintenance, sharpening is reshaping. Many Japanese knives are best served by gentle stropping and periodic sharpening on whetstones rather than aggressive honing rods.
Choosing the Right Whetstone for Japanese Knives
A good whetstone for Japanese knives is one of the best investments you can make in your kitchen. Unlike pull-through devices or electric machines, a well-chosen Japanese water stone gives you full control over the edge, preserves your knife’s geometry, and respects the work of the artisans who forged it.
Water Stones vs. Oil Stones
Most Japanese knives are designed to be used with water stones rather than oil stones. Water stones:
- Cut quickly, especially on hard steels
- Produce a slurry that helps refine the edge
- Are easy to clean and flatten
Oil stones, on the other hand, are slower and less suited to very hard Japanese steels. For this guide, we’ll focus on water stones—often referred to simply as “whetstones.”
Grit Ranges and What They Mean
Choosing the best sharpener for Japanese knives usually means choosing the right combination of grit levels. Most home cooks can get excellent results with just two or three carefully chosen Japanese whetstones. Here’s a simple breakdown:
| Grit Range | Type of Stone | Primary Use |
|---|---|---|
| 200–800 | Coarse | Repair chips, reset bevels, fix very dull edges |
| 800–2000 | Medium | Main sharpening, creating a working edge |
| 3000–6000 | Fine | Refinement, improved push-cutting ability |
| 8000+ | Polishing | Mirror finishes, ultra-refined slicing edges |
Coarse Stones (200–800 Grit)
Coarse stones are used when the knife is very dull, has micro-chips, or needs a new bevel angle. They remove material quickly and should be used with care. For many home cooks, a coarse stone is not a daily necessity, but it’s invaluable when restoration is needed.
Medium Stones (1000–3000 Grit)
If you’re wondering where to start, a 1000 grit whetstone for Japanese knives is the workhorse. It is ideal for regular sharpening of a knife that’s starting to feel dull but not damaged. A 1000/3000 or 1000/6000 combination stone is a fantastic starter option for most home cooks and pros alike.
Finishing Stones (4000–8000 Grit)
Finishing stones refine the scratch pattern left by the medium stone and polish the edge. For slicing proteins, vegetables, and herbs with a smooth, controlled feel, a 3000–6000 grit stone is more than enough. Higher grits can offer a more mirror-like polish for those who enjoy ultra-refined edges.
Specialty Stones (Natural Stones, Nagura Stones)
Natural Japanese stones and nagura stones are advanced tools that can further refine or shape a specific edge feel. These are more common in the toolkits of sharpening enthusiasts and professional sharpeners. Beginners don’t need to start here, but it’s helpful to know they exist for future exploration.
How Many Stones Do You Really Need?
For most people, the “best sharpener for Japanese knives” is a simple, reliable progression of:
- 1 x 1000 grit stone (main sharpening)
- 1 x 3000–6000 grit stone (refinement)
- Optional: 1 x 400–600 grit stone (repairs)
With this set, you can sharpen almost any Japanese kitchen knife at home with professional-level results.
Pro Tip: Invest in quality stones rather than the cheapest options. High-quality stones cut more consistently, last longer, and make sharpening easier and more enjoyable.
Ready to start sharpening? Explore Hasu-Seizo’s curated selection of Japanese water stones and accessories, thoughtfully chosen to pair beautifully with artisan knives.
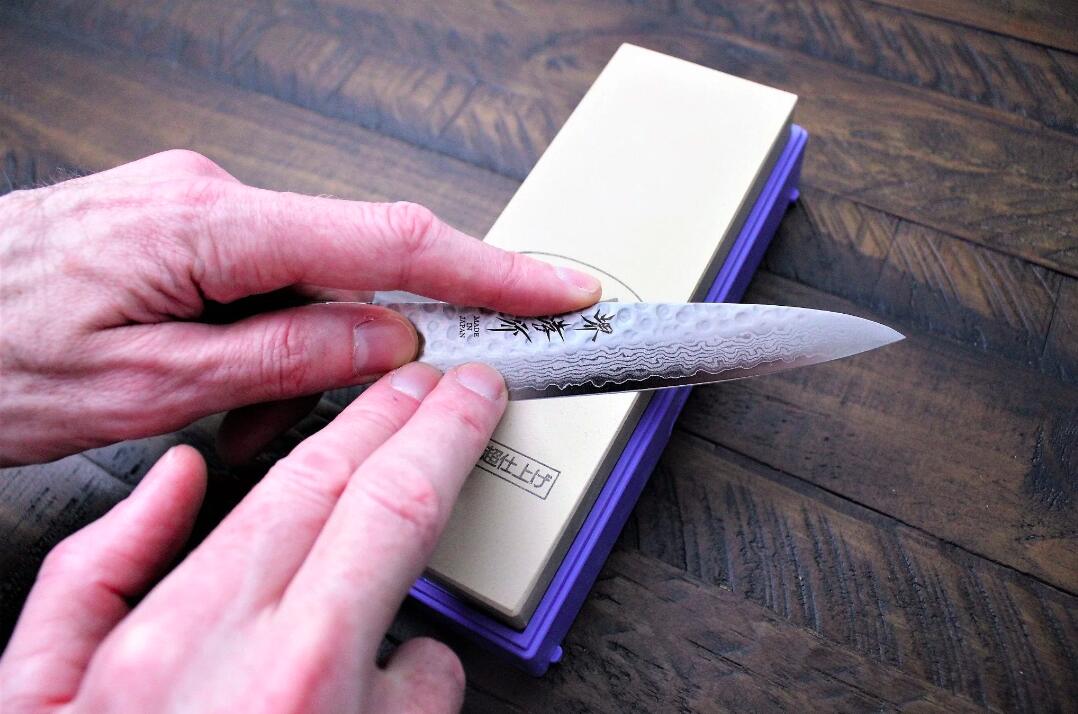
Step-by-Step: How to Sharpen Japanese Knives on a Whetstone
This section is your practical roadmap for how to sharpen Japanese knives on a whetstone. Take your time, move slowly, and focus on technique rather than speed.
Step 1: Prepare Your Whetstone
- Soak the stone (if it’s a soaking stone) for 10–15 minutes, or until bubbles stop rising. Splash-and-go stones only need a surface splash.
- Place the stone on a stable base—a stone holder, a damp towel, or a non-slip mat—to prevent sliding.
- Set up good lighting so you can see the edge and water clearly.
Step 2: Set Your Angle
- Hold the knife in your dominant hand with a relaxed but secure grip.
- Place the blade on the stone and raise the spine until you reach your desired angle (for example, 12–15°).
- Support the blade with the fingers of your other hand, placed gently near the edge (not on the edge itself).
Step 3: Sharpen the First Side
- Starting near the heel of the knife, push or pull the blade along the stone, depending on your preference. Many people find a push stroke (edge leading) more intuitive.
- Use light to moderate pressure, focusing mainly during the forward stroke and easing up on the return.
- Work in sections along the blade—heel, mid, and tip—keeping your angle consistent.
Step 4: Raise and Chase the Burr
As you sharpen one side, you’ll create a tiny “lip” of metal that folds over the edge—that’s the burr. It’s your sign that you’ve reached the apex of the edge.
- After several strokes in each section, gently feel for a burr by running your fingertip (carefully!) off the spine, across the edge.
- Once you feel a continuous burr from heel to tip, you’ve sharpened that side sufficiently.
Step 5: Repeat on the Opposite Side
- Flip the knife and repeat the process on the second side, matching your Japanese knife sharpening angle as closely as possible.
- Create a burr in the opposite direction, ensuring you’ve reached the apex again.
- As you approach the end of this step, begin lightening your pressure to avoid over-grinding the edge.
Step 6: Refine on a Higher Grit Stone
- Move to your 3000–6000 grit stone and repeat the same sharpening sequence with lighter pressure.
- Your goal now is to remove the coarse-grit scratches and create a smoother, more refined edge.
- Burr formation will be smaller and more subtle at this stage—focus on even, gentle strokes.
Step 7: Strop for a Razor Finish
Stropping is a powerful way to refine and align your sharpened edge:
- Use a leather strop, loaded with a small amount of polishing compound (optional).
- Pull the knife away from the edge (edge trailing), at a slightly lower angle than your sharpening angle.
- Make 5–10 light strokes per side, focusing on smoothness and consistency.
Stropping cleans up any remaining micro-burrs and can significantly improve slicing performance.
Tip: A simple two-stone setup plus a strop is often the best sharpener for Japanese knives in a home kitchen. If you’re ready to build your sharpening kit, explore our selection of whetstones, stone holders, and strops designed to complement Japanese blades.
Advanced Techniques for Professional-level Sharpness
Once you’re comfortable with basic sharpening, you can experiment with advanced techniques to tailor the edge to your cooking style and steel type.
Micro-Beveling
A micro-bevel is a tiny secondary bevel created at a slightly higher angle than your main bevel (for example, sharpening at 12–13° and then adding a micro-bevel at 15–16°).
- Improves edge durability, especially on harder steels
- Can make re-sharpening faster, as you only need to work on the micro-bevel
- Useful for knives that see a lot of board contact or harder ingredients
Edge Thinning
Over time, repeated sharpening can move the edge up into thicker parts of the blade, making it feel “wedgier.” Thinning is the process of grinding the blade just behind the edge to restore a slimmer profile.
- Typically done on coarser stones (400–1000 grit)
- Requires patience and a steady angle slightly shallower than your main bevel
- Best approached slowly, checking your progress frequently
Sharpening Hard Steels (SG2, Aogami Super, Ginsan, etc.)
Many Japanese knives, especially higher-end artisan pieces, use high-carbon or powdered steels with high hardness (HRC 61–65). These steels:
- Hold an edge longer
- Benefit greatly from precise angle control
- May respond best to higher-quality stones that cut hard steel efficiently
Use moderate pressure and let the stone do the work. Hard steels reward patience and technique, especially when refined on higher grit stones.
How to Test Sharpness: 5 Effective Methods
After sharpening, you need a reliable way to test whether your edge is truly ready. Here are five widely used methods:
1. Paper Slice Test
Hold a sheet of printer paper in one hand and slice from the heel to the tip with your knife. A sharp Japanese knife should:
- Slice cleanly with minimal resistance
- Not snag or tear
- Feel smooth through the entire cut
2. Tomato Test
Place a tomato on the board and see if the knife will bite into the skin without pressure. A sharp edge will:
- Break the skin with minimal force
- Produce clean slices with little juice loss
3. Light Reflection Test
Hold the edge under a bright light and gently rotate it. Dull spots will reflect light back at you, while a keen edge will disappear into a dark line.
4. Fingernail Test (Advanced)
Very gently rest the edge on your thumbnail at a shallow angle. A sharp edge will “bite” and stay in place. A dull edge will slide. This test requires care and is best for experienced users.
Sharpening Mistakes to Avoid
When you’re learning how to sharpen Japanese knives, avoiding common mistakes can save you time and keep your knives in top shape.
- Using too much pressure: This digs the edge into the stone, creates deep scratches, and makes angle control harder.
- Inconsistent angles: Changing angles mid-stroke causes uneven bevels and weak edges.
- Skipping grits: Going straight from very coarse to very fine can leave a toothy, uneven edge under the polish.
- Using steel honing rods aggressively: Especially on hard Japanese steels, this can cause micro-chipping.
- Not flattening the stone: Hollowed stones make angle control almost impossible. Use a flattening stone to make sure that the whetstone is completely flat.
- Rushing the process: Speed is the enemy of consistency. Slow and steady wins. Treat each sharpening session as practice, and your results will quickly rival basic professional Japanese knife sharpening services.
Need help choosing stones and tools that reduce these risks? Curated whetstone sets and accessories can make sharpening simpler and more forgiving. Explore options that match your skill level and knife collection.
How to Maintain a Sharp Edge Between Sharpenings
Regular maintenance means you won’t have to do major “rescue” sharpenings as often. Here’s how to keep your edge performing beautifully between full whetstone sessions.
Use the Right Cutting Board
Hard glass, ceramic, or stone boards will blunt your edge quickly. Instead, choose:
- End-grain wood boards
- High-quality honoki (Japanese cypress or magnolia) boards
- Soft, forgiving synthetic boards such as Hasegawa Pro-PE Lite designed for knives
Practice Gentle Cutting Technique
Japanese knives are made for slicing, not prying or twisting. Avoid:
- Heavy chopping through bone (unless using a Deba designed for that work)
- Twisting the knife in hard foods
- Scraping the edge across the board—use the spine instead
Clean and Dry Properly
- Hand wash knives with mild soap and warm water
- Dry immediately with a soft towel
- Apply a thin coat of camellia oil to carbon steel blades if needed
Strop Regularly
A few gentle strokes on a leather strop after each prep session can dramatically extend the life of your edge, keeping your Japanese knife steel in peak condition with minimal effort.
Best Sharpening Tools and Accessories for Japanese Knives
So what is the best sharpener for Japanese knives? For most enthusiasts and professionals, the answer is a well-chosen set of stones and a few smart accessories.
Essential Tools
- Whetstones: A 1000/3000 or 800/6000 combination stone is an ideal starting point for most home cooks and pros.
- Stone Holder or Base: Keeps your stone stable for safe, controlled sharpening.
- Flattening Plate or Lapping Stone: Essential for maintaining a flat, reliable sharpening surface. The Naniwa No-Slip Adjustable base is a great starting point.
- Leather Strop: For edge refinement and quick touch-ups.
- Water Spray Bottle: Helps maintain a consistent slurry on the stone surface.
Optional but Helpful
- Angle Guides: Good for beginners to learn what 12–15° feels like such as with the Naniwa guide.
- Nagura Stone: Creates slurry and cleans the surface of fine stones.
- Protective Knife Sleeves or Saya: Protects the edge during storage or travel.
When to Seek a Professional Sharpener
Even if you’ve mastered basic sharpening, there are times when sending your knife to a professional sharpener—or consulting an experienced shop—is the wisest choice.
- Severe damage: Large chips, bends, or cracks in the blade.
- Broken tips: Repairing a tip requires careful reshaping to maintain the overall profile.
- Heavily asymmetric or single-bevel knives: If the geometry has been distorted, restoring it can be delicate work.
- High-value handmade pieces: When in doubt, trust an expert who understands Japanese knives and respects the maker’s intent.
A reputable sharpener or specialty shop can also assess the condition of your knives, recommend a sharpening interval, and suggest the right whetstone for Japanese knives in your specific collection.
Sharpening Japanese Knives: Your Next Steps
You’ve now explored the essentials of how to sharpen Japanese knives: the difference between honing and sharpening, choosing the right whetstone, understanding the ideal Japanese knife sharpening angle, and following a step-by-step process to create and refine a razor edge. You’ve seen how to test sharpness, avoid common mistakes, and maintain your edge through thoughtful daily habits.
Sharpening is a skill, not a mystery. With a stable workspace, a consistent angle, and a good whetstone for Japanese knives, you can achieve results that honor the craftsmanship of your blades and transform how you cook.
From here, your next steps are simple:
- Choose a reliable sharpening setup—at minimum, a 1000 grit stone and a 3000–6000 grit finishing stone.
- Set aside a calm, unhurried session to practice on one knife.
- Focus on feeling the stone, keeping your angle consistent, and working patiently until you form and refine a burr.
With each session, you’ll build confidence and control. Over time, sharpening will feel less like a chore and more like a quiet, rewarding ritual—one that connects you to the long tradition of Japanese craftsmanship and elevates every meal you prepare.
Ready to begin? Explore Hasu-Seizo’s curated collection of Japanese whetstones, strops, and knife care accessories, and give your blades the edge they deserve.


